


Welcome to the ScotchBlue™ Painting Party!

A group of fantastic DIY bloggers, including myself, all completed projects with the help of ScotchBlue™ Painter’s Tape with Edge-Lock™ Paint Line Protector.
If you’d like to start at the beginning of the party and see more tutorials, head to Brittany’s blog:
Brittany @ Pretty Handy Girl
Halsey @ Spunky Junky *You are here!*Kim @ Sand and Sisal *Continue to this blog next!*
Allison @ Fab Rehab Creations
Michelle @ Ten June

I live in a university town. When something free gets set on the street it is gone in like T minus two minutes.
Gone. Vanished. Good Bye--yeah, that fast.
A majority of the time the before mentioned free items are actually placed on the street by college kids. That means that true treasures are far and between, most times the free items are dressers missing drawers, bed sets that consist of a full mattress and a queen set of springs, peg-legged chairs, and tables made for that pong game.
So when my sister found this table it was a total miracle no one picked it up before her--not wobbly, all four legs (attached), and made from real wood.
For awhile she had the table in her house, but when she moved I inherited the lovely.

My first order of business was to give it a good ole' paint job.
Once I primed the table using my always favorite Kilz Primer, I then used Martha Stewart's Popcorn paint in semi-gloss to give the table a distinctive splash of white.
Once I primed the table using my always favorite Kilz Primer, I then used Martha Stewart's Popcorn paint in semi-gloss to give the table a distinctive splash of white.
Once the paint dried we (Sister and I) used ScotchBlue™ Painter’s Tape with Edge-Lock™ to map out the chevron pattern.
 We made a pattern using wrapping paper to use as a guide. By taping below and above the wrapping paper we were able to create a design that was symmetrical and consistant.
It was a little easier said then done once we started the process...


Once the pattern was taped out I then used a credit card to flattened the tape to make sure the paint wouldn't bleed under my pattern. 

We also followed around the outer edge of the table with tape to stop the paint from bleeding over the edge.

See? Nice, flat tape.

For the other color of the chevron pattern we used Martha Stewart's Sultana paint. I only purchased a sample size of this color because I knew we would only need enough to cover the table top--and to be honest I actually only used half of the sample container.

Here comes the tricky part.
We did three layers of paint. We allowed the first two layers to dry completely, however with the third layer we removed the tape right after painting.
This is an important step because if you let the paint dry completely then once you begin to rip off the tape the paint may come up with it too--this happened to us when we got to the last strips of tape.

Once dry we took a light sandpaper across the top of the table for two reasons. First, by sanding down the top of the table we got rid of the ridges that were created by the tape lines--thus creating a smooth surface.
The second reason we sanded the table was create a more distressed effect--that way if there were any inconsistancies in the table it would seem as though they were meant to be there.

Not finished yet...
For furniture items that are under a lot of wear and tear (i.e. tables, night stands, and coffee tables) I recommend covering then in some sort of laquer.
My recommendation is to not use polyurathane. Not only will it make the table turn yellow-ish, but will indent when something hot is placed on it.
I used a polycrylic because it can stand a lot of abuse and it doesn't dry with a yellow-ish tint.
In between each coat of laquer I would lightly sand down the polycrylic--I repeated this process four times.
Again, just a recommendation....
;)

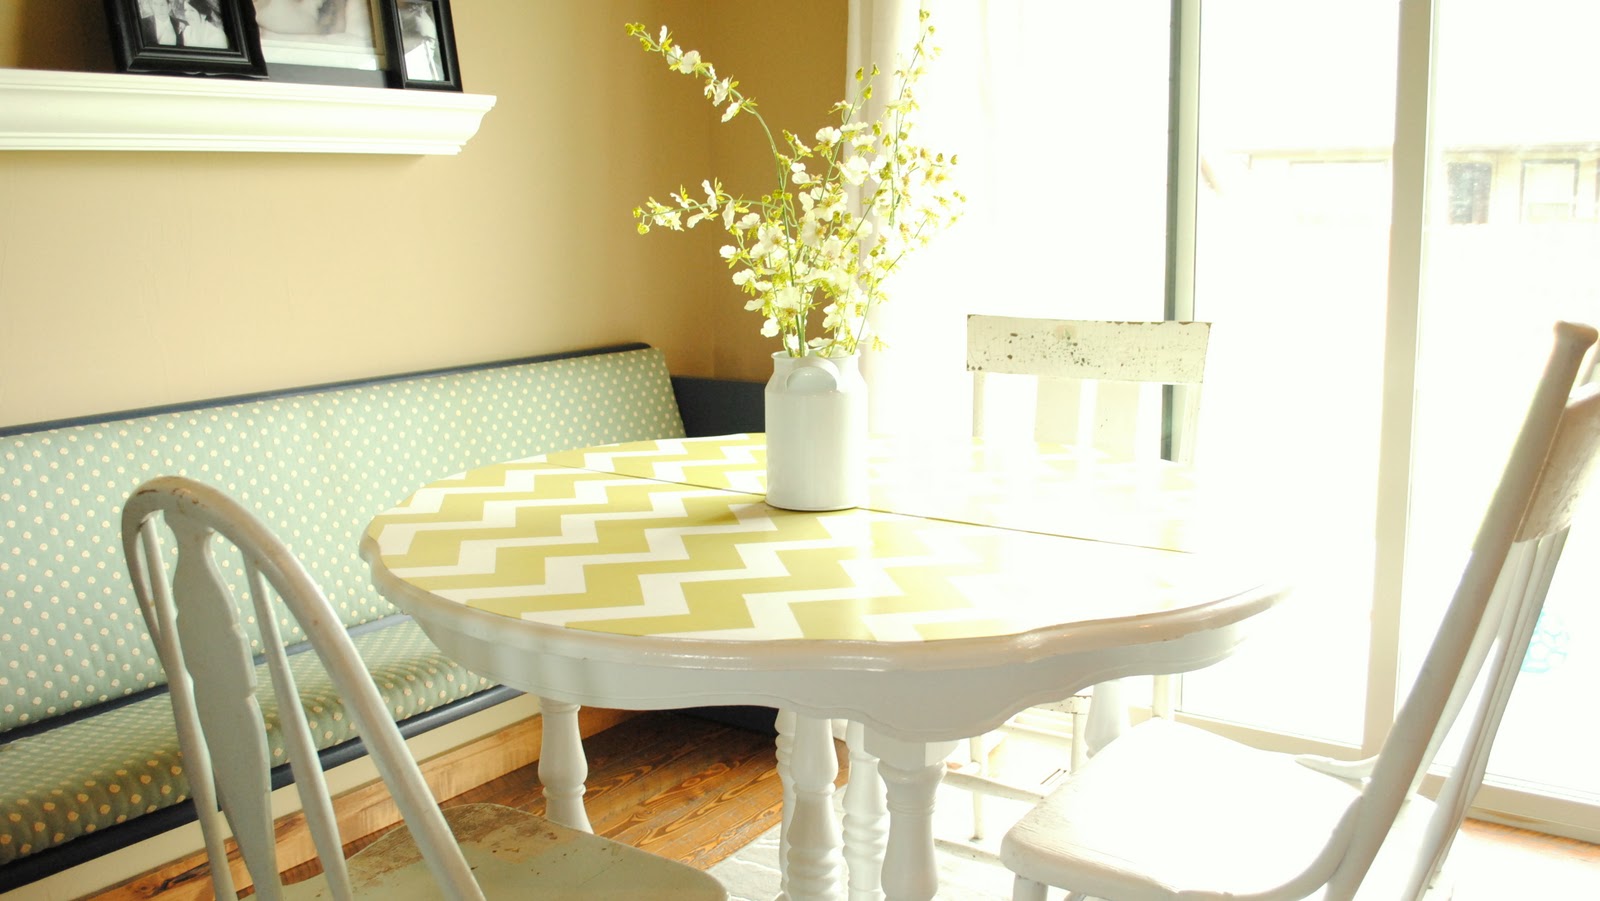
Isn't it lovely?
Hunk is still trying to decide if he likes it, but I am sure that over time he will learn to love my beauty (if it stays clutter-free).
hahaha.
Also, check out this post to find out how I filled in some of the holes on my dining room table. And don't forget to keep checking back to learn how I reupholstered my church pew, and to find out where I got my inspiration for my photo wall.

Review
I really enjoyed using ScotchBlue™ Painter’s Tape with Edge-Lock™ Paint Line Protector. The tape created really clean, crisp lines, and it worked well on flat surfaces and rounded corners.
If I pulled the tape up quickly after my last layer then my lines were perfect, if I let it dry too long then some of the paint would pull up too--this however, was operater error, and was not the tape's fault.
Overall, it's a great product that I would use again and again. I have already used it with paint, spray paint, and glass etching powder and it has worked wonderfully.
Now it's YOUR turn to gather inspiration, have fun, and win some prizes!
How would you like a chance to win some Scotch Blue painters tape with edge-lock paint line protector?
CLOSED
*Comment here on this post and let me know what project you would use YOUR Scotch Blue on (1 entry)
* Tweet "@ScotchBlueBrand I want #supersharppaintlines for my next project" and then come back and let me know that you've done so (1 entry)
*Become a follower of the Scotch Blue Facebook page, while there check out all of the other customers and bloggers who have posted amazing projects using THEIR Scotch Blue painters tape!
Thanks for stopping in!
ScotchBlue Brand reached out to me to participate in the ScotchBlue Painting Party to celebrate the launch of their new ScotchBlue Painter’s Tape with Edge-Lock Paint Line Protector. My post represents my honest experience with ScotchBlue Painter’s Tape. I am not being paid for my answers, but I did receive ScotchBlue Painter’s Tape to assist in completion.

Oh Halsey, you lucky duck you! That table is gorgeous and the final results are stunning. Hopefully the hunk will come around, but if it means anything, I LOVE IT!
ReplyDeleteBrittany aka Pretty Handy Girl
hi Halsey! your table is absolutely gorgeous! i love the chevron pattern and the colors you chose!!
ReplyDeleteThe table turned out fabulous! Love chevron!
ReplyDeleteAh-mazing. I love, love, love the table..the colors, pattern, all of it!
ReplyDeleteI've actually been thinking of a chevron project too- a large tray. That tape would totally help!
ReplyDeleteI'd try painting a pattern on an old dresser we have.
ReplyDeleteI love your table. I've yet to do a chevron pattern. hmmm
ReplyDeletegail
The table is lovely (I love chevrons, stripes & plaids), but think I'd start on something easier like stripes on a mid-century record cabinet I inherited. It looks like I better stock up on this wonder tape! Thanks for sharing your project and letting us play along.
ReplyDeleteAhh! This is so so precious! I seriously love it. I have a table in my basement that could use a little bit of love... and this might be the trick! Thanks for sharing : )
ReplyDeleteGreat work
ReplyDeletekeep posting
Holy cow that looks beautiful! Recently while doing crafts with a friend and her little girl we ruined the top of her table and she's going to use your table for inspiration. May even use the same colour and pattern!
ReplyDeleteGirlfriends Are Like Shoes
Hi,
ReplyDeleteJust arrived on this internet world, I discovered this fantastic blog wich, maybe, can help me. First, congratulations for your table; very pretty, and a lot of work.
My case is as follows: I have a cofee table or end table wich tabletop is NOT round but oblong. Painted in very dark color, I don't like that anymore. So I have decided to repaint it in a very light color, but I would like to have a very nice painted tabletop. Where discover the design and how do it. Do you any informations about stencils or something wich help me? All informations are welcomed.
Thanks a lot in advance
Joaquim
Best Twin Mattress Under $100
ReplyDeleteThe value we offer is unmatched, providing highly attractive price points without sacrificing quality of materials, labor and individualized service.
ReplyDeleteWhen Choosing a Solar Contractor, it is always an advantage for them to be local, reliable, articulate and friendly. Use American products only. Solar Earth is all of the above, located in the beautiful Santa Ynez Valley. All the Modules installed are manufactured in America and backed by a twenty-five year guarantee.
http://solarearthinc.com/